Debug Example : Setting an automatic breakpoint following a ColdFusion Exception throw
This example will show how to set an automatic breakpoint following an exception taking place in ColdFusion. This example will set the breakpoint at the line of code where the exception occurred using the FusionReactor Production Debugger.
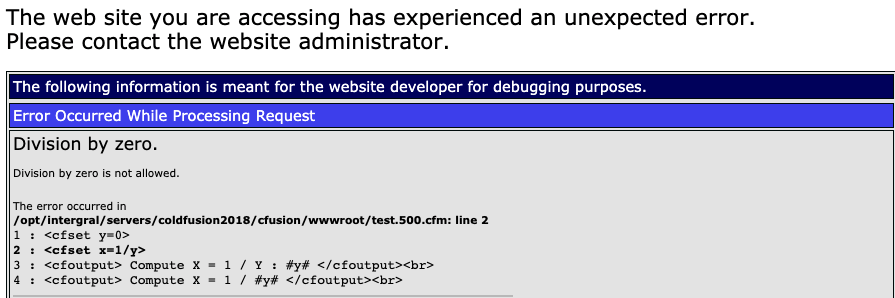
This code example will cause a 500 error to be generated caused by a Dive by Zero.
cfm tab="test.500.cfm"
<cfset y=0>
<cfset x=1/y>
<cfoutput> Compute X = 1 / Y : #y# </cfoutput><br>
<cfoutput> Compute X = 1 / #y# </cfoutput><br>
<cfoutput> X = #x# </cfoutput><br>
FANTASTIC - PAGE WORKED FINE - YOU SAVED PRODUCTION
## Setting an automatic breakpoint following an exception
After running the example file show above - we generated the following
HTTP 500 Error.
In the [Requests->Request History](../Requests/Request-History.md) page, we see
the following error has been captured:

By clicking on the Request Details Icon  we can drill into the Error Details tab.
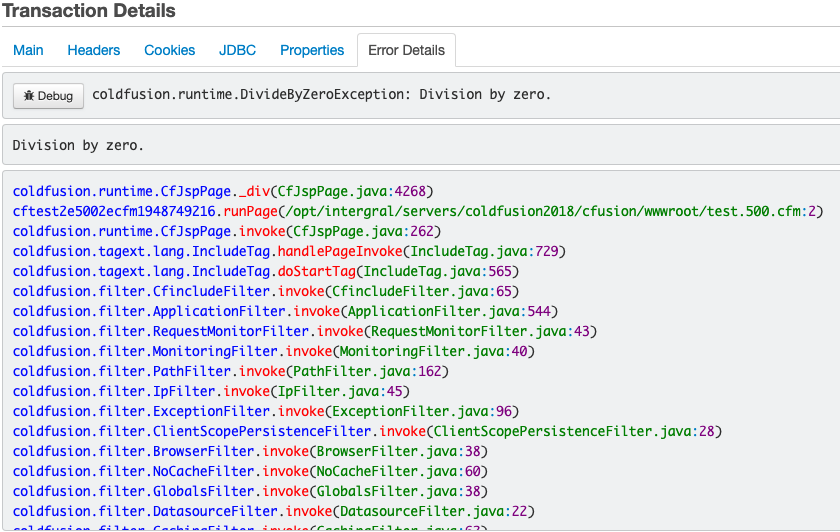
The source file and the line where the error is shown is here:

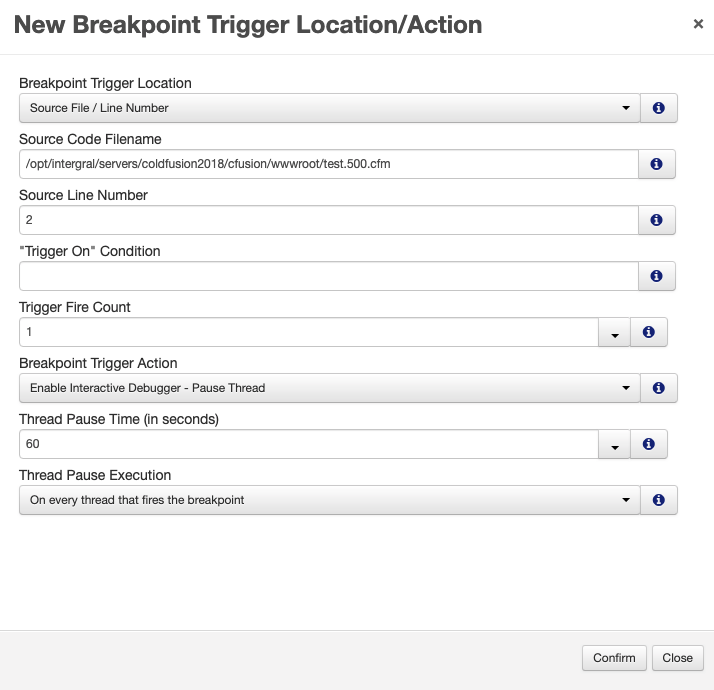
If we simply click on the Source File Link -
(`/opt/intergral/servers/coldfusion2018/cfusion/wwwroot/test.500.cfm` in
our example), then FusionReactor will automatically set the breakpoint
for us and the following dialog will appear.
|Production Debugger Field|Value|Meaning|
|--- |--- |--- |
|Breakpoint Trigger Location|Source File/Line Number|We are selecting to set a breakpoint within a specific source file and a specific line number|
|Source Code Filename|/path/to/test.500.cfm|Name / location of the file where the code is stored|
|Source Line Number|2|Line at which the exception occurred|
|"Trigger On" Condition||No condition is required here|
|Trigger Fire Count|1|This indicates that the breakpoint will fire once. If we set the Fire Count to a different numeric value, e.g. 10 - then the breakpoint will fire ten times. We can also set this value to 'Always' in which case the breakpoint will fire indefinitely.|
|Breakpoint Trigger Action|Enable Interactive Debugger - Pause Thread|Will tell FusionReactor to pause the currently executing thread when the condition has been met|
|Thread Pause Time (in seconds)|60|The thread will be paused for 60 seconds. During this time, the breakpoint can be intercepted by clicking on the Production Debugger icon - or the Debugger menu item. You must then select the debug icon on the paused thread. It may also be intercepted via the running transactions page or the threads page, by selecting the debug icon for the thread/transaction - .|
|Thread Pause Execution|On every thread that fires the breakpoint|Will cause the engine to halt for every single thread in which the breakpoint condition fires.|
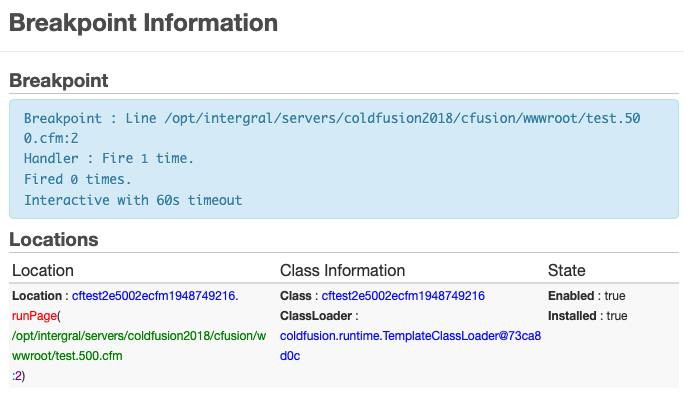
When the breakpoint has been set up, you will see the following when you
click the breakpoint information button in the **Debugger** page.
## Seeing when a breakpoint fires
The next time that our test page `test.500.cfm` is executed,
FusionReactor will halt execution at line 2.
When the breakpoint fires, then the Debugger icon will appear in the top
banner:
You can either click on the **Debugger** icon or click the **Debugger**
link in the Debug Menu to view the currently paused threads - together
with the Timeout Countdown

To start the Production Debugger session, you need to click on the Debug
Icon for the thread - 
## Working with the Production Debugger in the Thread View Page
The Thread View page shows the details of a specific thread once the
thread has been paused in the interactive debugger.
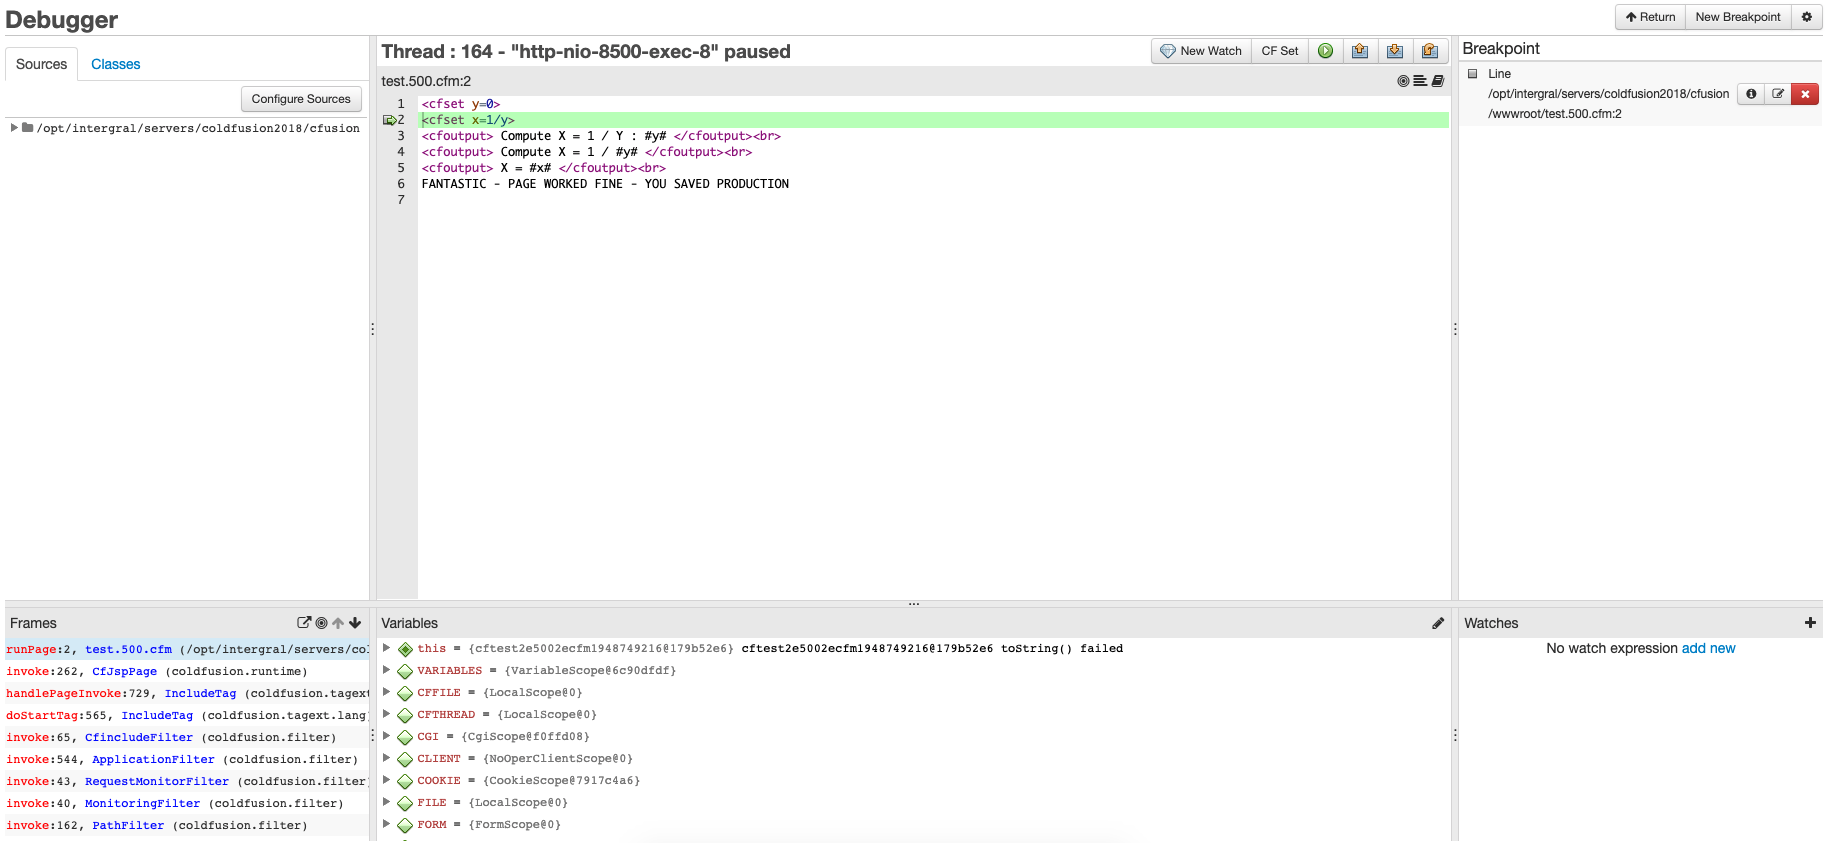
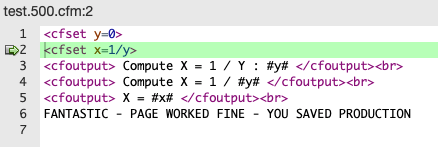
## Source Code Viewer
The source code viewer will show the source code for the location where
the interactive debugger is currently paused - line 2 in our example.
The variables viewer shows the variables currently available on the
thread at the specific location that the interactive debugger has
paused.
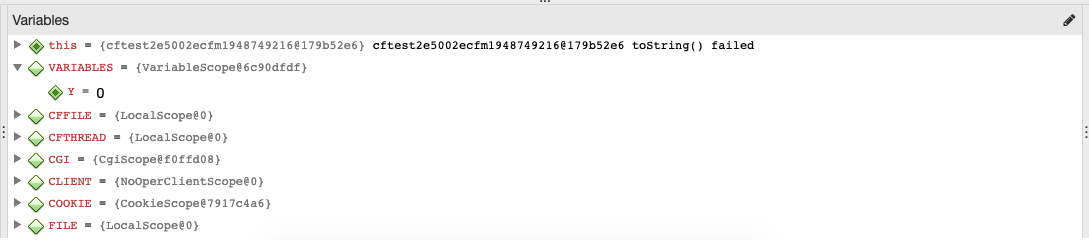
## Modifying a variable value
In order to correct the divide by zero problem, we would need to set `Y`
to a value ( other than `0` )
Y = 2
In this case - as we are setting a Numeric value, we can simply
overwrite the value in the Variables form field
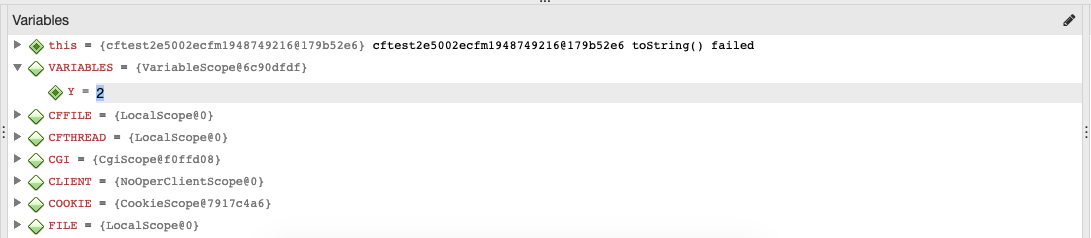
After changing the value of the field, you must hit the `RETURN | ENTER`
key for the value to be updated.
Once you have changed the variable value, hit the Resume icon  above
the source code view to continue execution of the program.
The page results will then look like.
Note
if you instead receive an error that 'The request has exceeded the allowable time limit Tag: cfoutput', try adding <cfsetting requesttimeout="3600"> to the top of the page. This will increase the page timeout to 60 minutes, allowing the program to stay paused by FusionReactor for much longer before resulting in a timeout once resumed. You will also need to modify the breakpoint to fire on line 4 with this extra line at the top of the file.